Joe is a passionate runner who has dedicated his life to the sport. With over 50 marathons under his belt, he has traveled the world to experience the thrill of running and the sense of community that comes with it. Despite a recent weight gain, Joe is determined to get back to his former self and continue running marathons. He wants to use his experiences and knowledge to help others achieve their running goals and join him in this amazing journey. Through his blog, Running with Joe, he shares his journey and offers tips and advice for runners of all levels.
If you are a runner who regularly hits the gym for strength work, you already know the struggle. You are in the middle of a heavy set of squats, your heart rate is up, and your hands are full. The last thing you want to do is stop, dry off your hands, unlock your phone, and manually type “Barbell Squat, 3 sets of 8 reps” into a fitness app.
It is a friction point that leads to one of two outcomes: either your workout logs end up incomplete, or you just skip the strength training altogether.
As a coach, I constantly see runners neglect their strength work simply because logging it is a hassle. But building a reliable Apple Watch gym tracker workflow can change that entirely.
In this guide, we are going to look at how to achieve completely hands-free workout tracking using just your Apple Watch and a powerful app called Motra (formerly Train Fitness). We will cover exactly how it works, why it matters for your running, and how to set it up today.
Crucial disclaimer before we dive in: Motra is an iOS-only app that requires an Apple Watch. It relies entirely on the Apple Watch’s motion sensors to do its job. If you are an Android user, unfortunately, this specific hands-free ecosystem is not available to you just yet.
Why Hands-Free Logging Matters for Runners
As runners, we love our GPS watches. Tracking mileage, pace, and heart rate is seamless. But when it comes to strength training for runners, the technology often falls short.
Most fitness apps require you to treat your phone like a clipboard. Manually logging sets interrupts the flow of your workout, extends your rest periods unnecessarily, and distracts you from the actual purpose of being in the gym: building strength to complement your running and prevent injuries.
When you switch to hands-free workout tracking, you unlock a few distinct advantages:
You stay in the zone: No breaking your focus to fumble with a screen.
Better accuracy: Because the logging is automatic, your workout history is actually complete.
More consistency: Less friction in the gym means you are more likely to stick to your cross-training for runners plan year-round.
Enter Motra: The Ultimate Apple Watch Gym Tracker
If you want to track your lifts without touching a screen, the Motra app is currently the best tool for the job.
Motra uses the advanced motion sensors already built into your Apple Watch to detect what exercise you are doing and count your repetitions for you. All you have to do is start the workout on your wrist, perform your exercises, and let the watch do the rest.
Try Motra Pro completely free: If you want to skip ahead and see it for yourself, the app is offering readers of this blog 2 months of Motra Pro completely free using this exclusive referral link: https://motra.com/referral/guilhermefreire8.
What Motra Actually Tracks
To keep things strictly hype-free, let’s look at exactly what Motra can do right now:
Automatic Exercise Detection: The app can automatically detect over 470+ exercises.
Automatic Rep Counting: By analyzing your wrist movement, it counts your reps in real-time as you perform them.
Progressive Overload Tracking: Just like you track your weekly running mileage, Motra tracks your training volume and intensity, helping you ensure you are actually getting stronger over time.
Neural Kinetic Profiling: This is Motra’s proprietary tech. Basically, it builds a biomechanical profile based on your specific movement patterns to make the exercise detection and rep counting more accurate the more you use it.
AI-Generated Workouts: If you are unsure what to do in the gym, Motra provides AI-generated routines tailored to your goals.
Smart Recovery Insights: It helps you balance your gym work with your running by keeping an eye on your recovery status.
Comparing Manual Logging vs. Hands-Free Tracking
To understand why an Apple Watch gym tracker like Motra is a game-changer, let’s compare the two main ways people track their strength workouts:
Feature
Manual Fitness Apps
Hands-Free (Motra + Apple Watch)
Data Entry
Manual typing/swiping required
Fully automatic
Repetition Counting
User has to count and input
Automatic rep counting via motion sensors
Exercise Detection
User selects from a menu
Automatic exercise detection (470+ exercises)
Friction Level
High (requires phone access mid-workout)
Zero (stay in your workout flow)
Device Requirement
Any smartphone
Requires iPhone + Apple Watch
Step-by-Step: Setting Up Motra on Your Apple Watch
Getting started with Motra takes about five minutes. Here is exactly how to set up your hands-free strength tracking system:
Download the App: Head to the iOS App Store on your iPhone and download the Motra app. (Remember, it is iOS only).
Pair with Apple Watch: If you have your Apple Watch paired to your iPhone, Motra should automatically install the watch app. If it doesn’t, open the Watch app on your phone and toggle Motra on.
Start Your Workout: Open the Motra app on your Apple Watch. Select your workout type (like Strength Training) and hit start.
Just Lift: This is the best part. Put your phone away, set up your weights, and just start exercising. The watch will automatically detect the exercise you are doing and begin counting your reps from your very first repetition.
Review Your Log: When you are finished, end the workout on your watch. When you open your iPhone later, your entire workout—complete with exercises, sets, and reps—will be fully logged and waiting for you.
Who Is Motra For (And Who Should Skip It)?
As a coach, I am a big fan of tools that reduce friction and help runners stay consistent. But no single app is perfect for everyone. Here is an honest breakdown of who should use Motra, and who should skip it.
Who it is for:
Runners who cross-train: If you do regular strength work to improve your running economy and prevent injuries, this is an ideal setup.
Apple Watch users who hate manual logging: If you are tired of typing in sets and reps between exercises, Motra solves this problem completely.
Data-driven athletes: If you want to track progressive overload without the hassle of spreadsheets, Motra does the heavy lifting for you.
Who should skip it:
Android users: As mentioned, Motra relies deeply on the Apple Watch hardware. There is currently no Android/WearOS version available.
Athletes using obscure equipment: While it detects over 470 exercises, if your routine consists of highly unconventional, homemade gym machines, the automatic exercise detection might struggle to recognize the movement.
Frequently Asked Questions (FAQ)
Does Motra work without my phone?
Yes! As long as you start the workout from your Apple Watch, you can leave your phone in your gym bag, the locker, or at home entirely. The watch stores the data and syncs it to your iPhone app later.
How does the Apple Watch count my reps?
The Apple Watch contains advanced gyroscopes and accelerometers. Motra’s technology analyzes the specific motion patterns of your wrist and arms to identify when you complete a full, proper repetition of an exercise.
Is the automatic rep counting 100% perfect?
While the automatic rep counting and Neural Kinetic Profiling are incredibly impressive, no motion sensor is flawless. Rarely, it might miss a rep if your form breaks down significantly, but it is vastly more accurate and complete than the blank logs you get when you eventually give up on manual entry.
Final Thoughts + Get Your Free Trial
Consistency is the most important factor in both running and strength training. When tracking your mileage, you wouldn’t settle for an app that required you to manually type in your GPS coordinates every mile—you rely on automatic tracking. You should expect the same from your Apple Watch gym tracker.
By using Motra to automate your gym logs, you remove the biggest friction point in strength training for runners. You get to keep your focus, keep your hands free, and ensure your fitness data is completely accurate.
If you are an iOS user with an Apple Watch, I highly recommend giving this a try. You can test out all the premium features—including the AI-generated workouts and advanced progressive overload metrics—risk-free.
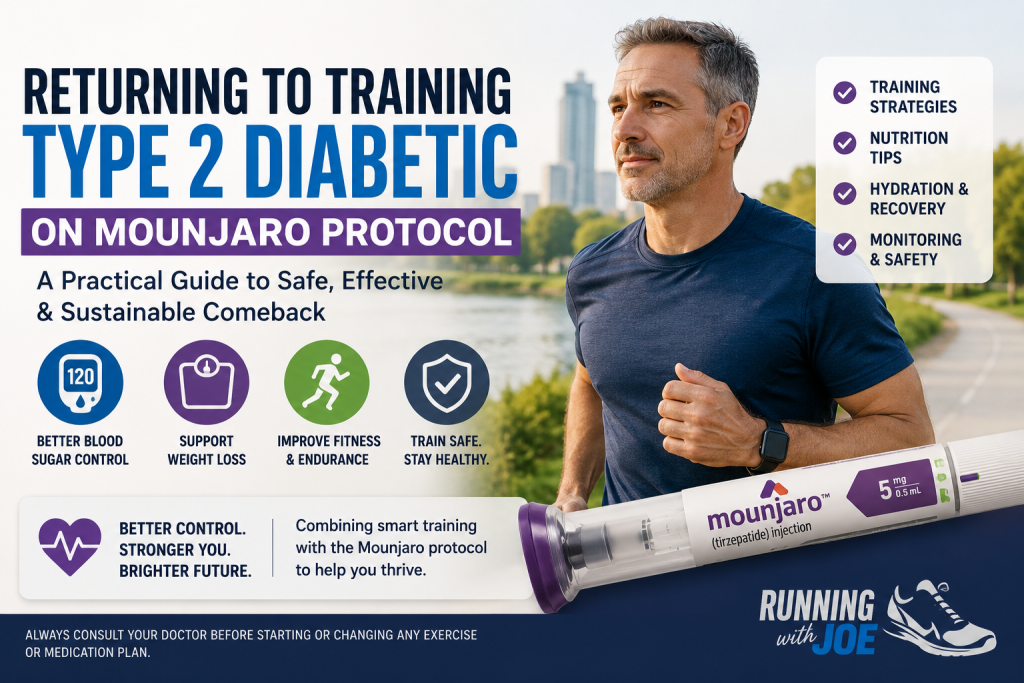
Returning to training as a Type 2 diabetic on Mounjaro (tirzepatide) is not only possible — it’s one of the strongest combinations for metabolic recovery available today
Mounjaro’s appetite suppression makes fueling for endurance work the hardest part — you need to actively eat enough, not just enough less
Hypoglycemia risk drops vs sulfonylureas/insulin but doesn’t disappear — carry fast-acting glucose for any run > 45 min
Most reasonable starting protocol: 3 days/week, Zone 2 only, 20-40 min sessions for the first 6 weeks. Then layer in 1 quality day
Expect 5-15 kg of weight loss to dramatically improve running economy — but also expect strength to drop if you don’t add resistance training 2x/week
Always coordinate with your endocrinologist before starting structured training, especially if you’re stacking Mounjaro with metformin, SGLT2, or insulin
If you’ve been diagnosed with Type 2 diabetes and your doctor put you on Mounjaro, you’re probably also looking at training again — either because you used to run and want to come back, or because your doctor said “you need to start moving.”
Good news: the combination of GLP-1/GIP agonists like tirzepatide + structured aerobic training is the most powerful intervention for metabolic syndrome we’ve ever had. Bad news: most generic running advice ignores the medication interaction, and most diabetic running advice was written before Mounjaro existed.
This is what actually works, based on what’s documented in clinical literature and what coaches who specialize in metabolic clients report. This is not medical advice — coordinate everything with your endocrinologist and sports medicine doctor before starting.
What Mounjaro actually does (in plain language)
Mounjaro is tirzepatide, a dual GLP-1 and GIP receptor agonist. Translated:
Glucose-dependent insulin release — your pancreas releases more insulin when blood sugar is high, less when it’s low. This is why hypoglycemia risk is much lower than with sulfonylureas or basal insulin
Glucagon suppression — your liver dumps less stored sugar into blood
Delayed gastric emptying — food sits in your stomach longer, so blood sugar rises slower after meals
Central appetite suppression — you feel full faster and stay full longer
Weight loss — clinical trials show 15-22% body weight reduction at higher doses over 72 weeks
“Mounjaro fixes one problem (excess body weight and poor glucose control) by partially creating another for athletes: insufficient caloric intake to fuel training adaptations.”
The 5 things that change when you train on Mounjaro
1. You won’t feel hungry, even when you should be eating
This is the single biggest issue for returning runners. Mounjaro kills appetite signaling. After a long run you’d normally crush a meal — on Mounjaro, the idea of eating can feel mildly disgusting. You must eat anyway. Train your mind: hunger is no longer a reliable signal for energy needs.
Practical fix: pre-plan meals around training. Schedule fuel like medication. A simple template:
Post-run within 60 min: 20-30g protein + 60-90g carbs (Greek yogurt + granola + fruit works)
If session > 60 min: 30g carbs per hour mid-run (gel, sports drink, dates)
2. Stomach upset is real, especially after dose escalation
Common side effects week 1-4 of any new dose: nausea, fullness, sometimes vomiting. Running with this is miserable.
Practical fix:
Don’t escalate dose the week before a key workout or race
If you start a new dose, drop training volume 20-30% for 7-10 days
Avoid high-fat pre-run meals (worse with delayed gastric emptying)
Hydrate aggressively — Mounjaro can cause dehydration when combined with sweating
3. Weight loss improves running economy fast — but strength drops too
Every kilo lost = roughly 2-3 seconds per kilometer faster at the same effort. So if you drop 10kg, your easy pace naturally improves 20-30 seconds/km. This is a real and motivating effect.
The flip side: weight loss on Mounjaro includes lean mass loss if you don’t actively prevent it. Lose your quads and you lose your running economy gains. Resistance training 2x/week is non-negotiable:
Squats, lunges, deadlift variations (bodyweight or weighted)
2-3 sets of 8-12 reps
Schedule on non-running days or after easy run days
4. Hypoglycemia risk drops — but doesn’t disappear
Mounjaro alone doesn’t cause hypos. But stacked with metformin, sulfonylureas, SGLT2 inhibitors, or insulin (very common combinations), risk goes up during exercise.
Practical protocol:
Test blood glucose before any run > 30 min. If < 100 mg/dL, eat 15-30g carbs first
Carry fast-acting glucose for any session > 45 min (glucose tabs, gel, juice box)
Test post-run if you feel “off” (sweaty, shaky, irritable)
Consider a CGM (Dexcom G7, Libre 3) — game changer for endurance training as a diabetic
5. Recovery takes longer at first
Lower glycogen stores + lower caloric intake + medication side effects = slower recovery than your pre-diabetes self remembers. Plan for it.
1 hard session per 3-4 easy
Sleep 7-9h prioritized (this is the highest-ROI recovery lever)
Active recovery (walk, easy bike) better than full rest for most
A realistic 12-week return protocol
Modified from published return-to-exercise guidelines for Type 2 diabetics, adapted for GLP-1 medication.
Weeks
Volume/week
Structure
Focus
1-2
60-90 min
3x walk/jog Z1-low Z2, 20-30 min
Get body moving, learn fueling routine
3-4
90-120 min
3x easy Z2, 30-40 min + 1x strength
Build aerobic base. No quality yet
5-6
120-180 min
4x easy Z2 + 1x strength + 1 longer (50-60 min)
Volume slowly up. Monitor BG patterns
7-8
180-240 min
4x easy + 1x light tempo (20 min) + 1 long (60-75 min) + strength
Whether dose escalation or de-escalation makes sense
Gear that actually matters for diabetic runners
Continuous Glucose Monitor (CGM) — Dexcom G7 or Libre 3. Real-time glucose during runs. Worth every dollar for safety + data
HR strap (not wrist sensor) — Polar H10 or Garmin HRM-Pro. Wrist sensors lie in Zone 2 territory. You need accurate HR to stay in the right zone
Hydration pack with pockets — carry glucose + ID + phone for any run > 45 min
Medical alert bracelet — emergency responders need to know you’re diabetic + what medications you’re on
Running shoes with extra cushion — diabetic feet are at risk of unnoticed injuries. Wide toe box + good cushion (HOKA, Brooks Glycerin, ASICS Nimbus)
What to discuss with your endocrinologist before you start
Adjust other diabetes meds for training days (especially sulfonylureas, insulin)
Target blood glucose range during exercise (typically 100-180 mg/dL)
Whether to time Mounjaro dose differently around long sessions
Annual foot exam + neuropathy screening before starting impact running
Cardiac stress test if you’re > 40 or have other risk factors
Eye exam — retinopathy can be aggravated by certain exercise types
Common questions
Will I lose weight from running on Mounjaro? Some additional weight loss, but most weight loss on Mounjaro comes from caloric restriction (because you’re not hungry). Running on Mounjaro is more about preserving lean mass and improving cardiovascular fitness than calorie burn.
Can I do a marathon while on Mounjaro? Documented cases exist. Requires meticulous fueling planning (against your reduced appetite) and CGM monitoring. Most coaches recommend waiting until weight stabilized and dose is established (typically 6+ months on therapy).
What if I want to come off Mounjaro after losing the weight? Coordinate with your doctor. Some people maintain remission of Type 2 diabetes through diet + exercise alone after weight loss. Others need to taper or maintain a maintenance dose. Stopping cold often results in appetite return + weight regain.
Will I be able to compete at the level I used to? Depends on starting point. Many returning runners report performance close to their pre-diabetes baseline within 12-18 months, especially when weight loss is significant.
The mindset shift
Returning to training as a diabetic on Mounjaro is not a “back to where I was” project. It’s a rebuild project. Your body chemistry is different. Your meds are different. Your appetite is different. Your weight is changing. Treat this as building a new athlete with the experience of the old one.
“The combination of Mounjaro + structured training isn’t just about getting back to running. It’s about putting Type 2 diabetes into long-term remission while building the strongest aerobic engine of your life.”
Medical disclaimer: This article is for informational and educational purposes only. It is not medical advice and is not a substitute for professional medical consultation. Always consult your endocrinologist and sports medicine physician before starting or modifying an exercise program, especially if you have diabetes, are on Mounjaro or any other GLP-1 medication, or have any other medical condition. Individual responses to medication and exercise vary significantly.
Third post in the “tools for international race travel” series. After Revolut (digital banking) and Bybit (primary crypto rail), this one’s about OKX — and more importantly, why I keep money on TWO crypto exchanges instead of just one.
Disclosure: Contains referral link. Sign up via my code → both get reduced fees and bonus. No extra cost. Not financial advice. Crypto carries serious risk.
Why Two Exchanges?
In February 2025, Bybit was hit by the largest crypto hack in history. Hackers stole ~$1.5 billion in ETH. Bybit covered all user funds (which is amazing), but the lesson stuck with me:
You don’t keep your training shoes, race gear, and travel docs all in one bag at the airport, right? Same logic for crypto.
I split funds across two reputable exchanges. If one has a problem (hack, regulatory shutdown, frozen withdrawals), I have access via the other.
What is OKX?
Founded 2017, originally as OKEx in China, now headquartered in Seychelles + Dubai. Top 3 global exchange by volume consistently.
What makes OKX different from Bybit (for someone using it as a “money tool”):
More altcoin listings — useful if your sponsor pays in some niche stablecoin or token
Best-in-class Web3 wallet integrated in the app — bridge between centralized and decentralized worlds
DEX aggregator built into the wallet — better swap rates than using individual DEXs directly
Practical Use Cases for Runners
1. Diversification (the main reason)
50% of stablecoin reserves on Bybit, 50% on OKX. If one exchange has issues, I have the other.
2. Receiving payment from sponsors using less-common tokens
Bybit listings cover 99% of mainstream tokens. OKX adds another 30-40% of long-tail tokens. If a sponsor wants to pay in some specific Layer 2 token, OKX usually has it.
3. On-chain DeFi access via OKX Wallet
Some race entries are now smart contracts on Ethereum (DAO-organized races, NFT-based bibs). OKX Wallet lets me sign transactions on those without a separate MetaMask install. Simpler.
4. Cross-border in countries OKX serves better
Some Asian and Middle East countries have better OKX local fiat onramps than Bybit. If I’m running a race in those regions, OKX is the local-currency bridge.
Spot Trading Fees
Operation
Fee
Spot maker
0.08%
Spot taker
0.10%
USDT (TRC20) withdrawal
~1 USDT
BTC withdrawal
varies (chain dependent)
Web3 swap fee (in-app DEX)
0.875% (rolled into rate)
Slightly cheaper maker fees than Bybit (0.08% vs 0.10%), if you place limit orders.
KYC Level 2 (for larger transactions): proof of address + financial info
Or manually enter referral code: 43152082(TODO real code)
Pros (vs Bybit)
More altcoin / multi-chain coverage
OKX Web3 Wallet is genuinely useful (Bybit’s wallet is more rudimentary)
Slightly cheaper maker fees on spot
DEX aggregator in app
Cons (vs Bybit)
More cluttered UI — Bybit feels cleaner for beginners
Compliance restrictions for some EU residents (post-MiCA)
Less aggressive welcome bonuses in my experience
Historical baggage: OKEx (the original entity) had a 2020 incident in China that paused withdrawals for ~5 weeks. OKX has improved compliance dramatically since, but worth knowing.
When OKX Makes More Sense
Running races in Asia/Middle East where local fiat onramps work better via OKX
You actively use Web3 (DeFi, NFTs, on-chain races)
Your sponsor pays in a less-common token
You want exchange diversification beyond just Bybit
When You Can Skip OKX
You’re running 1-2 races per year, all paid via Revolut
You don’t deal with sponsors or international prize money
You’re already overwhelmed by one exchange
For most casual runners: Revolut + ONE crypto exchange (Bybit OR OKX) covers 95% of use cases. The “use both” approach is for those handling more international finance traffic.
Referral link. Sign up → both benefit. No extra cost.
Cryptocurrency is high risk. Prices are volatile. Exchanges can fail. This post is educational, NOT financial advice. Consult a professional. Comply with your local laws.
[Coming: Final comparison + which exchange combo for which type of runner]
Bonus: MEXC for altcoins not on Bybit/OKX
For long-tail altcoins, I sometimes use a third exchange: MEXC. They list new tokens faster than anyone else. Use sparingly — long-tail altcoins are extreme risk. Not investment advice.
My Personal Setup (TL;DR)
For race travel and international running expenses:
Domestic banking: home country bank (Brazil/etc) — for local stuff
Crypto rail #1: Bybit (60% of stablecoin reserves)
Crypto rail #2: OKX (40% of reserves + Web3 access)
Cold wallet: Ledger/Trezor for HODL stack (not used for daily ops)
Total tools: ~4-5 apps. Sounds like a lot but each handles one specific job, and combined they save me hundreds per year in fees compared to “just use my home bank for everything.”
Introduction: Why Slowing Down Might Be Your Secret Weapon
For years, the running world has been obsessed with the “no pain, no gain” mantra. We’ve been conditioned to believe that unless we are pushing the pace, gasping for air, and leaving a puddle of sweat on the track, we aren’t making any real progress. But what if I told you that the secret to unlocking your best performance actually requires you to hit the brakes?
If you’ve ever felt completely gassed out during what was supposed to be an easy run, yet paradoxically struggled to hit your goal paces during a workout, you’re stuck in a very common trap. The missing link isn’t another grueling speed session—it’s Zone 2 training for runners.
It feels completely counterintuitive at first. Running slow to get fast is a tough pill to swallow, especially when your Strava feed is full of people pushing the pace every single day. But the exercise science is clear: hammering every run is a one-way ticket to burnout, injury, and plateaued fitness.
The good news? You don’t have to choose between building massive endurance and maintaining your top-end speed. In this guide, I’m going to walk you through a practical, evidence-based approach to aerobic base building. We will cover exactly how to structure your training so you can run longer, recover faster, and build relentless endurance without losing an ounce of your hard-earned speed. Let’s dive into why slowing down might just be your ultimate secret weapon.
The Trap of the ‘Junk Mile’ (And How to Escape It)
Picture this: you head out for your daily run. You aren’t sprinting, but you aren’t exactly jogging, either. You’re breathing heavily, maybe listening to a podcast but missing a few words here and there. You finish your route feeling moderately tired, but not completely destroyed. You’ve just logged what coaches affectionately call “junk miles.”
Also known as the “gray zone,” junk miles happen when you run at a moderately hard effort for every single workout. It’s that tempting middle ground where you feel like you’re putting in the work, but you aren’t actually pushing your limits.
Here is the harsh reality: running in this gray zone day after day is one of the biggest limiters of your potential. Why? Because it applies enough stress to accumulate chronic fatigue, but not enough specific stress to trigger meaningful physiological adaptations. You aren’t running slow enough to build a massive aerobic base, and you aren’t running fast enough to improve your top-end speed or VO2 max. You’re just stuck in the middle—tired, stagnant, and wondering why your race times have hit a wall.
If this sounds familiar, take a deep breath. You are far from alone, and it is incredibly easy to fix. The secret isn’t about adding more grueling track intervals to your week; it’s about running with more purpose and better energy distribution. By embracing Zone 2 training for runners, you can systematically escape this trap. This science-backed approach ensures your easy days are truly easy, allowing your body to recover, build mitochondria, and improve endurance without the heavy, lingering fatigue. There is a better, proven way to train, and it starts with stepping out of the gray.
What Exactly is Zone 2 Training? The Science of the Slow Run
Let’s strip away the complex sports science jargon for a moment. If you’ve been researching Zone 2 training for runners, you might expect a complicated physiological formula, but the concept is actually beautifully simple.
Technically speaking, Zone 2 refers to a specific intensity level—usually about 60 to 70 percent of your maximum heart rate. But forget the numbers and chest straps for a second. Think of Zone 2 as your “all-day pace.” It is the sustainable, rhythmic speed you could theoretically hold for hours on end without needing to stop.
The Conversational Test
How do you know you’re actually in Zone 2? You should be able to comfortably hold a full conversation. If you’re running with a friend, you should be able to speak in complete sentences without gasping for air or pausing to catch your breath. If you can chat about your weekend plans or easily recap a podcast you’re listening to, you’re in the right zone. It feels comfortable, controlled, and honestly, it might even feel a bit too slow at first.
The Magic of Fat Oxidation
So, why is this relaxed effort so crucial? It all comes down to cellular science. When you run in Zone 2, your body relies primarily on fat oxidation for fuel.
During high-intensity speedwork, your body needs quick energy and burns through your limited glycogen (carbohydrate) stores rapidly. But when you stay in Zone 2, your body has the time and oxygen it needs to tap into your virtually limitless fat reserves. By staying in this low-intensity zone, you are effectively teaching your body to become a highly efficient, fat-burning engine.
This metabolic adaptation builds a massive aerobic base, increases your mitochondrial density (the powerhouses of your cells), and improves your endurance without putting undue stress on your joints and nervous system. In short, it’s the scientific secret to running longer and faster with less effort over time.
The Cellular Magic: Mitochondria and Capillaries
Let’s get a little geeky for a moment. I promise to keep it accessible, but understanding the actual biology behind your daily miles is the key to unlocking your true potential as an endurance athlete.
When you consistently implement Zone 2 training for runners, you aren’t just burning calories or checking a box on your training plan—you are fundamentally upgrading your cellular hardware. Specifically, you are targeting two massive physiological adaptations: mitochondrial density and capillary networks.
Think back to high school biology. You might remember the mitochondria as the “powerhouse of the cell.” Well, when it comes to endurance sports, they are the absolute most important organelles in your body. Zone 2 training is the primary stimulus for increasing both the number and the efficiency of your mitochondria. More mitochondria mean your muscles have more microscopic engines to convert oxygen and fat into usable energy. Because fat is a virtually unlimited fuel source (even in the leanest athletes), having a highly developed fat-burning engine means you can run for hours without hitting the dreaded “wall.”
But those shiny new mitochondria are useless without a delivery system. That’s where capillaries come in. Capillaries are the tiny, microscopic blood vessels that weave through your muscle tissue, delivering oxygen and nutrients while shuttling away metabolic waste products like lactate. Zone 2 is uniquely effective at building this capillary network. Think of it like expanding a one-lane dirt road into a multi-lane superhighway. The more capillaries you have, the faster and more efficiently oxygen can reach your working muscles, and the quicker you can clear out fatigue-inducing byproducts.
So, why does this cellular magic matter to your overall pace? By building a larger aerobic “engine” through increased mitochondria and capillary density, you are essentially raising your body’s speed limit at every intensity. You are teaching your body to go longer and faster while burning less fuel and producing less fatigue. Over time, that easy Zone 2 pace naturally drops, your race paces feel more sustainable, and you recover much faster between hard workouts. You are literally building a more efficient machine from the inside out.
Will Zone 2 Training Make Me Lose My Speed?
Let’s address the elephant in the room. I hear this concern constantly from runners who are skeptical about slowing down: “If I spend all this time running easy, won’t I lose my speed?”
It’s a completely valid question. After all, we’ve already established that Zone 2 is conversational, comfortable, and decidedly not fast. So how could running slow possibly help you run fast?
Here’s the reality: Zone 2 training does not replace speedwork—it enhances it. Think of it as building a wider, sturdier foundation beneath your existing performance house.
The Speed-Base Connection
When you build a robust aerobic base through consistent Zone 2 training for runners, something remarkable happens to your speed sessions. That track workout you’ve been grinding through? You’ll recover faster between intervals. That tempo run that used to leave you shattered? You’ll be able to sustain your target pace longer before the fatigue sets in.
Here’s why: a well-developed aerobic system clears lactate more efficiently, meaning you can handle more volume at higher intensities before hitting that dreaded wall. Your body becomes better at shuttling oxygen to working muscles, delaying the point where you shift from primarily aerobic energy production to anaerobic.
The Race-Day Advantage
But perhaps the most compelling argument for Zone 2’s impact on speed comes on race day. Picture the final miles of a 10K or the closing stretch of a half marathon. This is where races are won or lost—where runners either maintain their pace or dramatically fade.
Runners with a strong aerobic base can sustain their speed longer when it matters most. They have more left in the tank during that critical final push because their bodies have become incredibly efficient at utilizing fat for fuel, sparing precious glycogen stores for when they really need them.
The Practical Approach
So no, you won’t lose your speed by embracing Zone 2. But—and this is crucial—you still need to practice speed. The magic happens in the combination:
Build your base: 75-80% of your weekly mileage in Zone 2
Maintain your gears: 1-2 quality speed sessions per week
Recover faster: Watch how your improved fitness allows you to hit faster paces during those quality sessions
The world’s best distance runners understand this balance. They don’t choose between aerobic base and speed—they recognize that one feeds the other.
The Magic of the 80/20 Rule for Runners
Now that we’ve cleared up the speed myth, let’s talk about one of the most powerful training principles you’ll ever encounter. It’s called the 80/20 rule, or polarized training, and it might just change everything about how you approach your running.
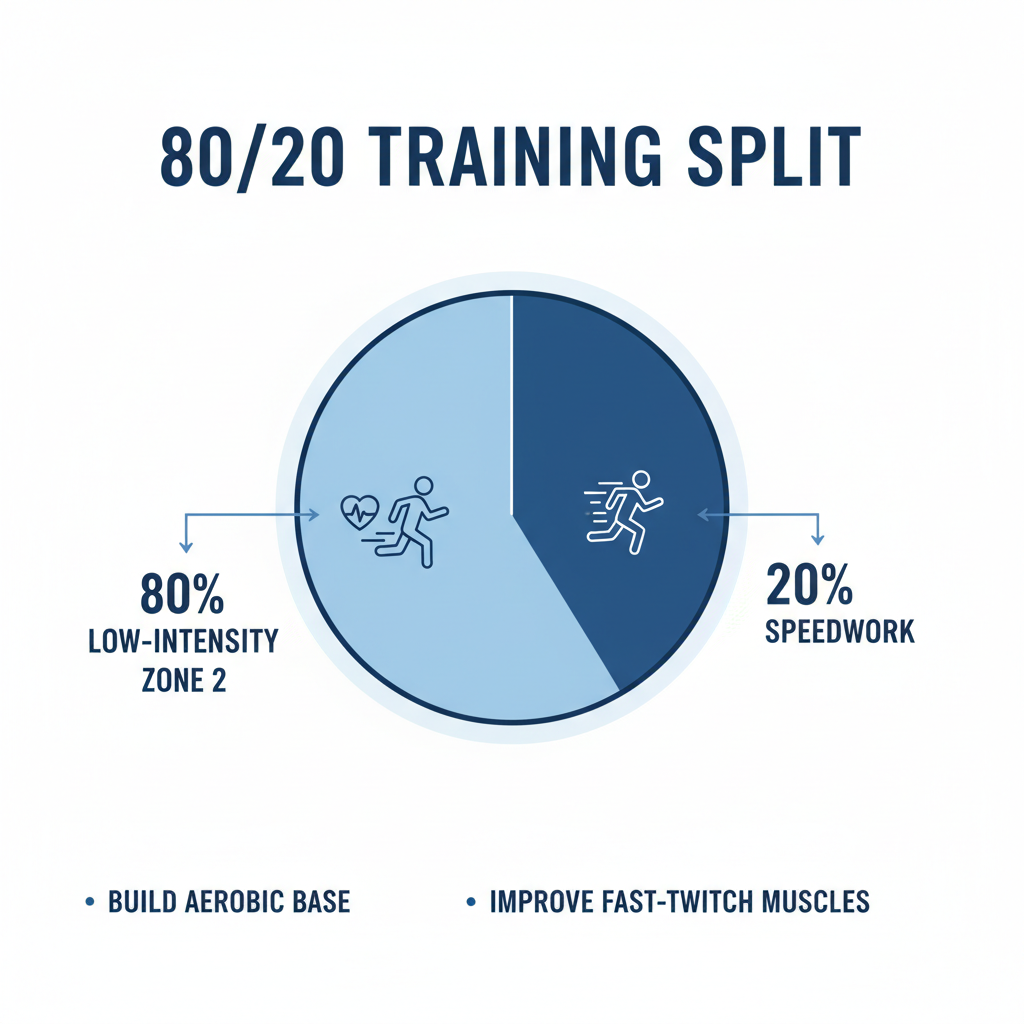
Here’s the concept in a nutshell: Elite runners spend approximately 80% of their training time at low intensity and only 20% at high intensity.
Not 50/50. Not 60/40. But a whopping 80% of their time running easy.
This isn’t just anecdotal wisdom passed down from coach to coach. This is hard science, backed by decades of research. Stephen Seiler’s work on polarized training is one of the clearest modern references for why this distribution works so well (Seiler overview). Exercise physiologist Stephen Seiler spent years studying the training habits of elite endurance athletes across multiple sports—running, cycling, cross-country skiing, rowing. His findings were remarkably consistent across all disciplines: the world’s best endurance athletes overwhelmingly follow this 80/20 distribution.
But here’s what’s truly fascinating: when Seiler looked at recreational runners, he found something entirely different. Most amateur runners train in what he calls “the black hole”—a murky middle ground where every run is moderately hard. They’re not going easy enough to build aerobic base, and they’re not going hard enough to truly stimulate adaptation. It’s the athletic equivalent of spinning your wheels.
I used to live in that black hole. Every run felt like a 7 out of 10 on the effort scale. I was always tired, my times had plateaued, and I couldn’t figure out why I wasn’t improving despite running six days a week.
Then I discovered the 80/20 approach and implemented Zone 2 training for runners into my routine. The transformation wasn’t overnight, but it was real. Within a few months, I was running faster race times while feeling fresher and more energized on my daily runs.
So why does this work so well? It comes down to a beautiful synergy:
The 80% enables the 20%.
When you keep the vast majority of your training in Zone 2, you’re building that massive aerobic engine we talked about earlier—developing mitochondria, growing capillary networks, teaching your body to burn fat for fuel. You’re also recovering properly between your hard sessions.
This means that when it’s time for your 20% high-intensity work—your track intervals, your tempo runs, your hill sprints—you’re actually fresh enough to hit those sessions with quality. You can run faster, maintain better form, and push harder because you haven’t been grinding yourself into the ground with moderate-effort runs every day.
Think of it this way: your Zone 2 training builds the engine, and your high-intensity training tunes it for maximum performance. You need both, but they need to be in the right proportion.
The research supports this approach. Studies have shown that when recreational athletes switch from their typical moderate-intensity training to a polarized 80/20 model, they see significant improvements in performance, even when total training volume remains the same. One study published in the Journal of Applied Physiology found that trained athletes who adopted polarized training improved their 10K times by an average of 5%, while those who continued with threshold-heavy training saw no improvement.
The message is clear: if you want to race fast, you need to train slow most of the time. It feels counterintuitive, especially when your running buddies are hammering every group run. But the evidence is undeniable, and the elites who consistently reach the podium have already figured this out.
Now that you understand why zone 2 training for runners is so powerful and how it fits into the broader 80/20 framework, let’s get practical. How do you actually implement this approach in your own training?
How to Find Your Exact Zone 2 Pace and Heart Rate
You do not need perfect lab data to start. What you need is a repeatable way to keep easy runs truly easy.
Use This Decision Tree
If you have a reliable chest strap and lactate-threshold data, anchor Zone 2 to heart rate.
If you want a fast starting point today, use the Maffetone 180-minus-age formula.
If your devices are unreliable or you prefer a simpler approach, use the Talk Test and confirm it with RPE.
Heart Rate Beats Pace on Most Easy Days
Pace changes with hills, heat, fatigue, terrain, and wind. Heart rate usually reflects the physiological cost more honestly, which is why it is often the best ceiling for easy running.
A Practical Starting Range
Start with Maffetone’s 180 formula, then create a working range about 10 beats below that ceiling. If you are returning from injury, coming back from a long layoff, or getting sick often, subtract another 5. If you have been training consistently for years without setbacks, adding 5 can be a reasonable experiment. Use that number as a starting point, not a permanent identity.
Confirm It With Feel
On a true Zone 2 run, you should be able to speak in full sentences, keep your shoulders relaxed, and finish feeling like you could keep going. If the watch says you are in range but your breathing feels ragged, trust your body over the device.
Navigating Cardiac Drift
Picture this: You’re 45 minutes into a beautiful, steady long run. You’ve locked into a pace that feels completely comfortable, and your breathing is rhythmic and controlled. But then, you glance down at your watch. Your heart rate has slowly crept up from 140 bpm to 155 bpm, yet your pace hasn’t changed by a single second. Panic sets in. Am I losing fitness? Did I go out too fast?
Take a deep breath. What you are experiencing is a very common, entirely normal physiological phenomenon known as cardiac drift (or cardiovascular drift). When you dive deep into Zone 2 training for runners, understanding cardiac drift is absolutely crucial for your sanity.
As you run, a few things happen inside your body. Your core temperature naturally rises, and you lose fluid through sweat. To keep you from overheating, your body redirects blood to the surface of your skin to help cool you down. Because more blood is being diverted to your skin, there is slightly less blood returning to your heart. To maintain the exact same cardiac output—keeping your hard-working muscles fueled with the oxygen they need—your heart has to beat a little faster to compensate.
Hence, the upward drift.
It is not a sign that your aerobic fitness is plummeting, nor does it mean you are accidentally slipping into Zone 3. It is simply your body’s internal air conditioning system kicking into gear.
When to Ignore the Monitor and Trust Your Feel
So, how should you handle cardiac drift? The biggest mistake I see endurance athletes make is frantically slowing down to keep their heart rate glued to a specific number, eventually breaking into a ridiculous, unnatural shuffle just to appease their wrist watch.
Here is my practical, experience-backed advice: start your run guided by your heart rate monitor. But once you hit the 30 to 45-minute mark, and your effort level feels exactly the same as it did at minute five, it’s time to shift your focus.
If your breathing remains rhythmic, your muscles feel fresh, and you can still easily pass the ‘Talk Test’—ignore the heart rate monitor and switch entirely to RPE (Rate of Perceived Exertion). Stay focused on how your body feels rather than chasing a static number. Your watch is a fantastic tool to help you learn what Zone 2 feels like, but it shouldn’t be a cruel master that forces you into an awkward, slow-motion panic. Trust your body’s perceived effort, respect the drift, and keep running strong.
The 5 Most Common Zone 2 Mistakes Runners Make
Let’s be honest: mastering Zone 2 training for runners is harder than it looks. You’d think running slow would be the easiest thing in the world, but it’s surprisingly challenging—especially for type-A athletes.
I get it. There’s a massive ego struggle when you’re out there running a pace that feels embarrassingly slow. You might even find yourself secretly hoping none of your running friends drive by and see you shuffling along at what looks like a recovery pace. And don’t even get me started on the frustration of bad data—when your heart rate monitor is giving you wonky readings and you have no idea if you’re actually in the right zone.
But here’s the truth: the runners who succeed with Zone 2 are the ones who learn to troubleshoot these common pitfalls early. Let’s dive into the mistakes I see most often so you can avoid them.
1. Letting Your Ego Dictate Your Pace
We’ve all been there. You step out the door for an easy run, the sun is shining, your legs feel fresh, and suddenly you’re flying down the bike path at a pace that feels effortless. Or maybe you’re running with a friend who’s slightly faster than you, and you don’t want to be the one huffing and puffing to keep up.
It’s human nature. Our ego wants us to prove something with every single run.
But here’s the truth: leaving your ego at the door is one of the hardest but most important skills you’ll develop as a runner.
When you implement Zone 2 training for runners, you’ll likely encounter days where your prescribed pace feels almost ridiculously slow. You might find yourself thinking, “I can go faster than this. What will the neighbors think?” Or worse, you might glance at your Strava feed and feel the urge to push the pace so your splits look impressive.
This ego-driven mindset is sabotage for your aerobic development.
Remember what we covered earlier: Zone 2 isn’t about looking fast or feeling tough. It’s about building that massive aerobic engine through patience and discipline. When you let your ego dictate your pace—pushing into Zone 3 or 4 on days meant for recovery—you’re effectively stealing from your own progress.
I’ve been guilty of this myself. Early in my training journey, I’d head out for “easy runs” that mysteriously turned into tempo efforts because I felt good. The result? I was constantly fatigued, my race times plateaued, and I couldn’t figure out why my hard workouts felt impossible.
The moment I committed to truly easy running—swallowing my pride when a 10:30 pace was what my heart rate demanded—everything changed. My fitness skyrocketed, my recovery improved dramatically, and I actually started enjoying my training again.
Here’s your action step: Before every easy run, remind yourself of the purpose. Is today’s goal to build your aerobic base? Then respect the zone. If you feel fantastic and want to push, save that energy for your designated speed workouts.
True strength isn’t about going hard every single day—it’s about having the discipline to go easy when it matters most. Your future, faster self will thank you for it.
2. Relying Solely on Wrist-Based Heart Rate Monitors
If you’re serious about Zone 2 training for runners, I need to tell you something that might save you months of frustration: your fancy new GPS watch with the optical heart rate sensor? It’s probably lying to you.
I hate to be the bearer of bad news, especially when you just dropped $400+ on a shiny new running watch. But if you’re relying solely on wrist-based heart rate monitoring to stay in Zone 2, you might be working with flawed data.
The Cadence Lock Problem
Here’s what’s happening on your wrist: optical heart rate sensors work by shining light into your skin and detecting blood flow changes. It’s clever technology, but it has a significant Achilles’ heel—something called “cadence lock.”
Cadence lock occurs when your watch mistakes your arm’s movement (your running cadence) for your heart rate. Your watch essentially gets confused between the rhythmic bouncing of your arm and the rhythmic pumping of your heart. The result? Your watch might display 160 bpm when your actual heart rate is only 140 bpm—or worse, show 130 bpm when you’re actually at 165 bpm.
This isn’t a rare occurrence. Studies have shown that wrist-based heart rate monitors can be off by 10-20 beats per minute during running, and cadence lock can happen during any run, at any pace.
Why This Matters for Zone 2
When you’re targeting Zone 2, precision matters. We’re talking about a window that might only be 10-15 beats per minute wide. If your watch is off by 15 bpm due to cadence lock, you could think you’re nailing your Zone 2 run when you’re actually deep in Zone 3—or vice versa.
I’ve seen runners push themselves too hard for months, wondering why they weren’t seeing the benefits of Zone 2 training for runners, only to discover their watch was underreporting their heart rate by 20 bpm. That’s the difference between an easy aerobic run and a moderate tempo effort.
The Solution: Chest Strap Heart Rate Monitors
If you want reliable, accurate heart rate data—and for Zone 2 training, you absolutely do—you need a chest strap heart rate monitor. These devices measure the electrical signals from your heart (like an EKG), not optical blood flow changes.
Two recommendations I stand behind:
Polar H10: Often considered the gold standard for heart rate accuracy in the running community. It’s comfortable, reliable, and compatible with most GPS watches and apps.
Garmin HRM-Pro: If you’re already in the Garmin ecosystem, this is a fantastic choice. It also tracks running dynamics, which can be useful for form analysis.
Yes, it means wearing an extra piece of equipment. Yes, it’s another thing to charge and keep clean. But the data accuracy is worth every penny and every small inconvenience.
A Practical Approach
If you’re not ready to invest in a chest strap, I understand. Here’s my compromise: use the Talk Test (which we discussed earlier) as your primary Zone 2 guide, and treat your wrist-based heart rate data as a rough estimate, not gospel truth.
But if you’re committed to optimizing your training and getting the most out of every run, a chest strap is one of the best investments you can make in your running journey. Think of it this way: you wouldn’t navigate a new city with a broken compass. Why would you train your body with inaccurate data?
3. Ignoring Fueling Because ‘It’s Just an Easy Run’
Here’s a trap I see runners fall into all the time, and honestly, it’s one I used to fall for myself. You’re heading out for a “just an easy Zone 2 run,” so you grab your shoes, maybe a sip of water, and head out the door without a second thought about fueling. After all, it’s not a tempo run or a race—it’s just a slow, comfortable jog, right?
Well, not exactly.
The myth goes something like this: because Zone 2 training for runners primarily utilizes fat oxidation for energy, you don’t need to worry about taking in carbohydrates or electrolytes. Your body has plenty of stored fat to burn, so why bother with gels or sports drinks?
There’s a kernel of truth here, which is what makes this myth so convincing. Yes, Zone 2 running does rely heavily on fat as a fuel source. In fact, that’s one of the beautiful adaptations of training at this intensity—your body becomes incredibly efficient at burning fat for fuel. But here’s where the logic breaks down: efficient fat burning doesn’t mean exclusive fat burning, and it certainly doesn’t mean your body doesn’t need support.
Let’s break this down practically.
The Carbohydrate Reality: Even in Zone 2, your body is still burning a mix of fat and carbohydrates. The percentage shifts toward fat, yes, but you’re still using glycogen (stored carbohydrates) to some degree. When you’re out there for 75, 90, or 120+ minutes, that glycogen depletion adds up. I’ve seen countless runners bonk on long easy runs because they assumed they didn’t need any carbs. They’d call me confused: “But I was in Zone 2 the whole time! How did I run out of gas?”
The answer is simple: your body still needs some carbohydrate support, even at lower intensities. For runs under 60-75 minutes, you’re generally fine with whatever you ate beforehand. But once you start creeping past that 75-90 minute mark, I strongly recommend incorporating some simple carbohydrates—maybe 30-60 grams per hour, depending on your size and the duration. This could be a gel, some chews, or even real food if your stomach tolerates it.
The Electrolyte Equation: This is arguably even more important, and it’s the one most runners completely overlook. Just because you’re running easy doesn’t mean you aren’t sweating. Electrolytes—particularly sodium, potassium, and magnesium—are critical for muscle function, nerve signaling, and fluid balance regardless of your pace.
I learned this lesson the hard way a few years back. I went out for a planned 2-hour Zone 2 run on a warm morning. I figured, “It’s just an easy run, I’ll be fine with water.” By the 90-minute mark, I had a dull headache forming. By 105 minutes, my legs felt oddly heavy despite my heart rate being well within Zone 2. I ended up walking the last mile home, feeling completely depleted. The culprit? Dehydration and electrolyte imbalance. My pace was easy, but my sweat loss was real.
Now, I treat every run over 60 minutes—regardless of intensity—with the same respect for hydration and electrolyte replacement. A simple electrolyte drink or tablet in my water bottle has made a world of difference.
Practical Fueling Guidelines for Zone 2 Runs:
Under 60 minutes: Water is generally fine. Maybe a small pre-run snack if you haven’t eaten in a while.
60-75 minutes: Water with electrolytes. Consider a small carb source if you’re running on an empty stomach.
75-120 minutes: Water with electrolytes plus 30-40 grams of carbohydrates per hour.
120+ minutes: Full fueling protocol—electrolytes, 40-60 grams of carbs per hour, and potentially some protein for ultra-long efforts.
The Bottom Line: Your Zone 2 long runs are where you build your aerobic engine, and they deserve the same nutritional respect as your harder workouts. Think of fueling as part of the training itself—practicing your race-day nutrition strategy during these long, easy runs is invaluable. Your stomach can adapt to processing fuel while running, but only if you give it the opportunity to practice.
Don’t let the “easy” in easy run fool you. Respect the duration, honor your body’s needs, and fuel accordingly. Your legs—and your overall progress—will thank you.
4. Forgetting to Train by Feel
I learned this lesson the hard way during a 20-mile long run last fall. About 12 miles in, my watch died. No warning, no low battery alert—just a black screen. Panic set in immediately. How would I know if I was in Zone 2? Was I going too fast? Too slow?
But here’s what happened: I had one of the best final 8 miles of my life. I tuned into my breathing, paid attention to how my legs felt, and actually enjoyed the run instead of stress-checking my wrist every 30 seconds.
Here’s the reality: Gadgets fail. Batteries die, chest straps lose connection, optical sensors get confused by cold weather or sweat, and sometimes you just forget to charge the darn thing.
This is why developing your internal Zone 2 compass is non-negotiable. When you practice Zone 2 training for runners correctly, you’re building an intuitive sense of effort that no piece of technology can replicate.
So what does Zone 2 feel like?
Breathing: Rhythmic and fully controlled. You could breathe through your nose if required (though I don’t insist on exclusive nasal breathing)
Conversation: You can speak in full sentences without hunting for air
Muscles: Working but not heavy or accumulating burn
Mindset: Comfortable enough that you could maintain this pace for hours
Practice this: Once a week, leave the watch at home. Run by feel alone. Guess your effort level before you finish, then honestly assess: Could I truly hold this conversation?
This internal awareness is what separates dependent runners from resilient athletes.
5. Fearing the ‘Slowdown’ Phase
Here is a reality check that catches almost every athlete off guard: when you first start implementing dedicated Zone 2 training for runners, your easy pace might not just feel incredibly slow—it might actually get slower before it gets faster.
If you have spent months or years pushing the pace on your daily runs, you are likely walking around with a fair amount of latent fatigue. When you finally force yourself to slow down and stay aerobic, your body begins to offload that deep exhaustion. As a result, you might find that a heart rate of 140 bpm yields a 10:00 pace in week one, but only yields a 10:30 pace in week three.
I remember looking down at my watch during my first dedicated block of Zone 2 work and feeling completely defeated. My pace had slowed to an embarrassing shuffle. But here is the science-backed truth: this temporary slowdown is actually a sign that the system is working. You are finally addressing your aerobic deficit.
You are in the thick of the adaptation process. Building those dense networks of capillaries and powerhouse mitochondria takes time. During these initial weeks, your body is essentially rebuilding the engine while the car is still running. It requires a massive amount of internal energy, leaving less energy available for raw speed.
Please, do not panic and abandon the process when the pace drops. Embrace the slowdown phase for what it truly is: a necessary biological investment. If you can detach your ego from your pace and trust the process for 8 to 12 weeks, you will eventually reach a tipping point. One day, you will look down and realize that your heart rate is holding steady, your breathing is effortless, and your pace is naturally starting to creep back up—faster than it ever was before.
How to Implement Zone 2 Training Into Your Schedule This Week
Enough theory. Let’s get you out the door and actually doing this.
I know what it’s like to read about a training philosophy, feel incredibly motivated, and then completely freeze when it comes time to actually apply it. You’re excited, but you’re also staring at your training plan wondering, “Where does this even fit?”
Don’t worry. I’ve got you. Here’s a simple, actionable framework to start implementing Zone 2 training for runners this week—no matter what your current schedule looks like.
The Beginner’s Blueprint (3-4 Runs Per Week)
If you’re running 3 to 4 times per week, here’s your simple transition plan:
Week 1-2:
3 runs: Make ALL of them Zone 2. Yes, all three. Remember, you’re building the foundation. The aerobic base you’re developing right now is what everything else will be built on.
Pace check: Use the Talk Test for every run. If you can’t recite a full paragraph comfortably, slow down.
Duration: Keep your normal run durations—just change the intensity.
Week 3-4:
3 runs: 2 Zone 2 runs, 1 shorter run with some strides or light pickups at the end (15-20 seconds of faster running, with full recovery between each)
Goal: Start introducing a tiny bit of speed while maintaining your aerobic focus
The Intermediate Plan (5-6 Runs Per Week)
If you’re already running 5 or 6 days a week, the transition looks a little different:
This week, try this:
4 runs: Dedicated Zone 2 (these become your bread and butter)
1 run: Easy run with 4-6 x 20-second strides at the end
1 run: Workout day (tempo, intervals, or fartlek—this is where you get your 20% intensity)
The Advanced Athlete (Triathletes & High-Volume Runners)
For those of you already training 10+ hours per week across multiple disciplines:
Immediately shift 80% of your total training volume into Zone 2. For a triathlete training 12 hours per week, that means roughly 9.5 hours should be at this aerobic intensity.
Keep your existing quality sessions (track workouts, threshold sets, swim intervals) as your 20%. Don’t touch those yet.
The magic happens in the in-between: Those recovery spins, easy jogs, and long slow distance workouts? They all become strictly Zone 2.
Your Action Plan for THIS Week
Here’s your homework. I want you to treat this like an experiment—approach it with curiosity, not pressure.
Step 1: Choose your measurement method
If you have a chest strap heart rate monitor: Use it. Calculate your Zone 2 heart rate using the Maffetone formula we discussed earlier.
If you don’t have a reliable HR monitor: Commit to the Talk Test for every single run this week. No exceptions.
Step 2: Plan your week
Look at your schedule for the next 7 days
Identify which runs will be Zone 2 (hint: most of them)
Write it down. Commit to it. Tell a friend or training partner if you need accountability.
Step 3: Run your first intentional Zone 2 session
Leave your ego at the door
Start slower than you think you need to
Check in with your breathing every 5 minutes
If using heart rate, don’t panic if you need to walk up hills to stay in zone—this is normal!
Step 4: Track how you feel
After each run, jot down a quick note: How did the pace feel? What was your breathing like? Did you enjoy it?
Pay special attention to how you feel the next day. You might be surprised by how fresh your legs feel.
A Quick Reality Check
The first 2-3 weeks of proper Zone 2 training for runners can feel frustrating. Your pace might be slower than you’re used to. You might feel like you’re “not doing enough.” You might even question whether this whole thing is a waste of time.
It’s not.
Trust the process. Trust the science. Trust that every slow, easy mile is building an aerobic engine that will eventually power you to faster race times, quicker recovery, and a longer, healthier running career.
The athletes I’ve seen succeed with this approach aren’t the ones who naturally love running slow—they’re the ones who committed to the process even when their ego screamed at them to speed up.
Your challenge starts this week. Let’s see what happens when you finally give your body the aerobic base it’s been begging for.
A Practical Week of Training (Sample Schedule)
Enough theory—let’s get practical. I want to show you exactly what a balanced training week looks like when you’re implementing Zone 2 training for runners properly.
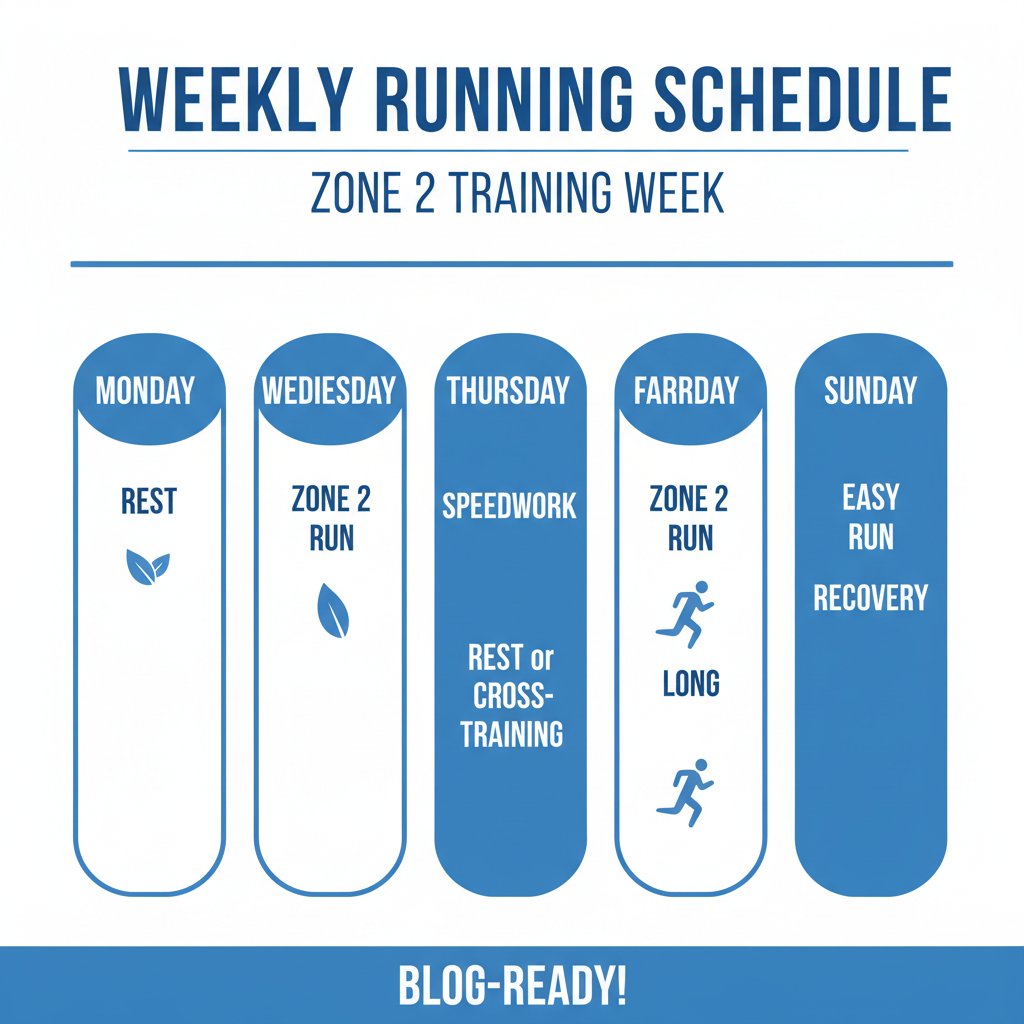
Below is a sample 5-day running week that follows the 80/20 principle. I’ve designed this to be adaptable, whether you’re a beginner building your base or an advanced runner training for a marathon. The key is seeing how Zone 2 runs support—and actually enhance—your higher-intensity work.
The Sample Week
Monday: Rest or Active Recovery
Take the day off completely, or do some gentle mobility work, yoga, or a walk. Your body adapts and gets stronger during rest, not during the workout itself. If you want a simple warm-up flow, pair this with Dynamic Stretching for Runners.
Tuesday: Zone 2 Base Run
Beginner: 30–40 minutes
Intermediate: 45–60 minutes
Advanced: 60–75 minutes
This is your bread and butter. Lock into your Zone 2 heart rate or use the Talk Test. Focus on maintaining a conversational pace throughout. This run builds your aerobic engine.
Wednesday: Speedwork / High-Intensity Day
Beginner: 20-minute warm-up (easy jog) + 6 x 400m repeats at 5K pace (90 sec recovery jog between) + 10-minute cool-down
Intermediate: 15-minute warm-up + 8 x 400m or 5 x 800m at 5K pace (2 min recovery) + 10-minute cool-down
Advanced: 15-minute warm-up + 6 x 800m or 4 x 1K at 5K-10K pace (2-3 min recovery) + 15-minute cool-down
This is where you get fast. These intervals should feel challenging—pushing your VO2 max and anaerobic threshold. Notice how the Zone 2 run yesterday left your legs fresh enough to actually hit these paces? If you race triathlon, Mastering Brick Workouts is a useful companion for the quality day.
Thursday: Rest or Cross-Training
Take a full rest day, or do some low-impact cross-training like cycling, swimming, or elliptical. If you cross-train, keep it easy—this isn’t the day to push.
Friday: Zone 2 Base Run
Beginner: 30–40 minutes
Intermediate: 45–60 minutes
Advanced: 60–75 minutes
Back to the slow stuff. Your legs might feel a little heavy from yesterday’s speedwork—that’s normal. Don’t force the pace. Let your heart rate guide you, even if that means running slower than usual.
Saturday: Long Run (Primarily Zone 2)
Beginner: 45–60 minutes
Intermediate: 75–90 minutes
Advanced: 90–120+ minutes
This is the cornerstone of Zone 2 training for runners. Your long run should be almost entirely in Zone 2, with maybe a few surges or strides at the end if you’re feeling spicy. This builds endurance, fat oxidation, and mental toughness for race day.
Sunday: Rest or Optional Easy Recovery Jog
Beginner: Full rest
Intermediate/Advanced: 20–30 minutes very easy jog (Zone 1) or full rest
Listen to your body. If you’re feeling wiped, take the day off completely. If you’re feeling good and want to shake out the legs, a super easy 20-minute jog can help with recovery.
Making It Work for You
A few quick notes on adapting this schedule:
If you run 3–4 days per week, simply remove one of the Zone 2 days and keep the speed session and long run. Those are your non-negotiables.
If you’re training for a specific race, you can adjust the Wednesday speedwork to match your event (tempo runs for half-marathoners, long intervals for marathoners, etc.).
If you’re a triathlete, swap one or two of the easy runs for easy bike rides or swims at the same Zone 2 intensity. The aerobic adaptations transfer across sports.
The beauty of this structure is its simplicity. You’re getting plenty of low-intensity volume to build your aerobic base, while still hitting the high-intensity work that makes you fast. It’s the same basic formula that elite runners have used for decades, and it works just as well for the rest of us.
FAQ: Zone 2 Training for Runners
How long does it take for Zone 2 pace to improve?
Most runners notice better pace at the same heart rate after 4 to 8 consistent weeks, especially if they stop turning every easy run into a moderate effort.
Should I walk hills to stay in Zone 2?
Yes. On steep climbs, walking is often the smartest way to keep the effort aerobic instead of accidentally turning the run into threshold work.
Can I do Zone 2 without a heart rate monitor?
Absolutely. The Talk Test and a relaxed RPE are good enough to build your base if you stay disciplined about keeping the effort conversational.
How many Zone 2 runs should I do each week?
For most runners, 3 to 5 easy aerobic sessions work well, with only 1 or 2 truly hard sessions layered on top.
Conclusion: Trusting the Process and Embracing the Slow
If you take one thing away from this entire guide, let it be this: slowing down on your easy days is the absolute best way to ensure you have the endurance and fresh legs to hit your fastest speeds on race day. It sounds counterintuitive, I know. But the science is clear, and decades of elite training data back it up.
When you embrace Zone 2 training for runners, you’re not taking the easy way out—you’re training smarter. You’re building the cellular machinery (those beautiful mitochondria and capillaries) that will eventually allow you to sustain faster paces for longer. You’re recovering properly so that when it is time to push hard during interval sessions, you actually have the energy to do so.
The hardest part? Trusting the process.
There will be days when your Zone 2 pace feels absurdly slow. There will be moments when you question whether this whole “easy running” thing is actually working. There will be runs where your ego screams at you to pick up the pace because the runner next to you is definitely going faster.
Ignore that voice.
Stay patient. Stay consistent. Trust that beneath the surface, your body is quietly building an aerobic engine that will carry you to new personal bests. Every easy mile is a deposit in your endurance bank account—and come race day, you’ll be incredibly glad you made those deposits.
You don’t have to be perfect at this. Even shifting most of your easy runs to true Zone 2 will yield massive benefits. Progress isn’t about perfection; it’s about direction.
So here’s my challenge to you: This week, try just ONE run strictly using the Talk Test. Leave the watch at home if you have to. Run at a pace where you could comfortably hold a full conversation. Pay attention to how your body feels before, during, and after.
Then, come back here and share your experience in the comments below. Did it feel weird? Did it feel too easy? Did you notice anything surprising? I want to hear about it.
Your future, faster self will thank you for embracing the slow.
This isn’t your typical crypto review. It’s about a real-world problem: how do you move money internationally for race trips, prize money, and gear purchases without your bank eating 5-8% in fees?
For me, the answer combines Revolut (covered in last week’s post) with a crypto exchange. This week I’m sharing how I use Bybit as a low-friction “money bridge” for international running expenses.
Disclosure: This post contains a referral link. If you sign up via my code, we both get reduced fees and a welcome bonus. No extra cost to you. Crypto carries real risk — this is educational, not financial advice.
Why a Runner Cares About Crypto Exchanges
If you’ve never run abroad, this won’t apply to you. Skip to the next gear post.
If you have, you know the friction:
– Wiring USD to a foreign training camp — bank charges $40, takes 3 days
– Receiving prize money from an international ultra — same problem, reversed
– Buying race entries when registration system only accepts EUR — your bank’s FX is brutal
– Paying a coach abroad — same currency dance
I started using stablecoins (USDT/USDC) for these flows about 2 years ago. Send/receive in seconds, fees of $1-3 instead of $30-50, no bank gatekeeping.
To do that, you need a crypto exchange that:
1. Lets you convert your local currency to USDT
2. Has cheap withdrawal fees on Tron network (TRC20)
3. Has good liquidity so you don’t lose to slippage
4. Plays nice with KYC across countries
Bybit checks all these boxes for me. Here’s why.
What is Bybit?
Founded in 2018, headquartered in Dubai. One of the top 5 global crypto exchanges by volume. Big in derivatives but also strong on spot trading and stablecoin services.
For a runner using it as a “money rail” (not for trading), what matters:
Fast KYC (15-30 min for level 1)
Stablecoin spot pairs (USDT/USDC against most major fiat options)
Cheap TRC20 USDT withdrawals (~1 USDT)
24/7 customer service (sluggish at peak but responsive)
How I Actually Use Bybit (Non-Trading)
1. Receive prize money or sponsorship in stablecoins
Some race organizers and brands now offer payment in USDT/USDC. Bybit gives me an address; they send; settles in minutes. Compare to:
SWIFT wire: 3-5 days, $30-50 in bank fees, FX markup
Stablecoin via Bybit: 5 minutes, $1-3 fee, exchange spread minimal
2. Cross-border training camp payments
Paying a coach in another country who accepts USDT? Send from Bybit wallet to theirs. Done.
3. Gear purchases from international shops accepting crypto
Some specialty shops (Nordic running gear, ultra-endurance brands) accept BTC/USDT. Buy direct, no FX bank fees.
4. Holding emergency travel funds in stablecoins
Going to a country with weak banking infrastructure or capital controls? Park funds in USDC/USDT on Bybit, draw down via local stablecoin merchants if needed.
⚠️ NOT financial advice — stablecoins have their own risks (de-pegging, regulatory). I keep maybe 5-10% of travel funds in stablecoins as a “Plan B”, not as primary.
Bybit Spot Trading Fees (For Reference)
Even if you’re not trading speculatively:
Operation
Fee
Spot maker
0.10%
Spot taker
0.10%
USDT withdrawal (TRC20)
~1 USDT
USDT withdrawal (ERC20 Ethereum)
~5-15 USDT (gas dependent)
BTC withdrawal
~0.0005 BTC
Deposit
Free
Always use TRC20 for USDT transfers — much cheaper than Ethereum.
KYC Level 1: passport/national ID + selfie. Done in ~15 min.
KYC Level 2 (for larger transactions): proof of address + bank statement. ~24h.
Deposit (USDT via TRC20 is cheapest from another exchange or P2P)
Both of us get the welcome bonus + you get reduced trading fees for 30 days
Bonus tip: I also keep some funds on MEXC for altcoins not yet listed on Bybit. Diversification across exchanges is risk management 101.
Manual code: QAKOBDV (enter at signup if you don’t use the direct link).
Honest Downsides
2025 hack memory: Bybit got hit by the largest crypto hack in history (~$1.5bn ETH stolen) in February 2025. They covered all user funds, but it’s a reminder: don’t keep more on any CEX than you’re willing to lose. Cold wallet (Ledger/Trezor) for HODL, exchange for active use.
Customer support quality varies by hour and language
EU/UK MiCA compliance restricts some features for European residents (e.g., higher leverage, some altcoins)
Not designed for fiat onramps in every country — some places require P2P trading via local agents (more friction)
When NOT to Use Bybit
You don’t trust crypto exchanges in general — fair, stick with Wise/Revolut
You only race domestically — Revolut is enough
You’re under stricter KYC oversight in your country — research local laws first
Bybit + Revolut Combined Workflow (My Setup)
For a typical international race trip:
Income arrives in my home country (BRL, EUR, etc) → Revolut
Major foreign currency expenses (race fees in EUR, hotel) → pay direct via Revolut Mastercard
Cross-border prize money or sponsorship in USDT → Bybit
Convert USDT back to EUR/BRL via Bybit spot → withdraw to Revolut → pay normally
Trip emergencies / countries with weak banking → keep small USDT reserve on Bybit accessible from any internet connection
Referral link in this post — both of us get a sign-up bonus when you join via my code QAKOBDV. No extra cost to you.
Cryptocurrency carries real risk. Prices are volatile. Exchanges can be hacked or insolvent. Stablecoins can de-peg. You can lose all funds invested. This post is educational/comparative, NOT financial advice or recommendation to invest. Consult a financial professional before making decisions. Comply with your local laws (some jurisdictions restrict crypto activity).
I’ve run marathons in Barcelona, Helsinki, Cyprus, and a half-dozen other places outside my home country. Every single one taught me the same painful lesson: using your regular bank’s debit/credit card abroad bleeds money. Foreign exchange fees, IOF, “international transaction” surcharges — they stack up fast.
The fix that actually worked for me is Revolut. This post is an honest review from a runner who travels for races, including how to set up an account with a sign-up bonus.
Disclosure: Some links in this post are referral links. If you sign up using my link, we both get a bonus, at no extra cost to you. I only recommend tools I personally use.
What is Revolut?
Revolut is a UK-based fintech (founded 2015) with 70+ million customers worldwide. Think of it as a digital bank app that replaces your traditional bank for travel-heavy use cases. You hold money in 30+ currencies inside one account, swap between them at near-interbank exchange rates, and spend with a debit card globally.
For a runner who travels for races, the killer feature is the multi-currency wallet + interbank FX rate — no markup, no shady “tourist exchange rate” your bank quietly applies.
Why Runners Should Care About Multi-Currency
If you’ve ever:
Booked a race in Europe and had to pay €60-150 in EUR via card
Stayed in Airbnb in Tokyo and watched yen come out of your account
Bought running shoes from On Running’s UK site for £180
Tipped a sherpa or paid a permit in cash in Nepal/Tanzania
…you know the pain. Bank cards typically charge 3-7% in combined fees and FX markup. On a €1500 trip (race + flights + accommodation), that’s €45-105 in pure fees to the bank. For nothing.
Revolut charges effectively 0-1.5% depending on amount and time of day. Math is obvious.
My Real Use Cases as a Runner
1. Race entry fees in foreign currency
Sign up for the Helsinki Marathon (€135 EUR), Barcelona Half (€55 EUR), Cyprus Marathon ($90 USD). I top up the corresponding currency in the app first, then pay. Zero foreign transaction fees.
Compared to my Brazilian bank card: 6-8% saved per transaction.
2. Hotel/Airbnb bookings abroad
Same thing — book in EUR/USD/GBP with funds already converted at interbank rate. Booking.com, Airbnb, and most hotel aggregators accept Revolut card globally.
3. Race-day expenses (taxi, food, gear shops)
The Revolut physical Mastercard works basically anywhere Mastercard is accepted. Contactless pay on metros, restaurants, gear stores. ATMs work too (free withdrawals up to €200/month on the free plan).
4. Splitting costs with running buddies
Running with a friend? Send them money in any currency instantly via the app. Useful for splitting the rental car or hotel.
5. Travel insurance (premium plans)
The Premium plan ($8/mo) includes travel insurance — useful if you’re flying to a destination race and worried about delays/lost gear. Coverage isn’t comprehensive but it’s a cheap baseline.
Plans Available
Plan
Price
Best for
Standard
Free
Casual race travelers (1-2 races/year abroad)
Plus
~€3/mo
Faster support, more virtual cards
Premium
~€8/mo
Lounge access, travel insurance, higher FX limit
Metal
~€14/mo
Frequent international flyers, higher cashback
For most runners: Standard (free) is enough. Premium is worth it if you fly internationally 4+ times a year.
What I Don’t Love About Revolut
Being honest:
Customer support is chat-only in most cases. If your account gets temporarily frozen (it happens — they’re conservative about fraud detection), getting it unfrozen can take 24-48h.
They sometimes flag legit transactions as suspicious, especially first-time large amounts. Annoying but explainable.
Cash withdrawals are limited on free plan (€200/mo). For races where you need cash for sherpas/local fees, consider upgrading temporarily.
Premium support cards sometimes take 10-14 days to arrive in mail. Order yours BEFORE the race trip, not last minute.
⚠️ Bonus amounts vary by country and may change. Check the app for current promotion after signup.
Comparison: Revolut vs Wise vs Local Bank for Runners
Use case
Revolut
Wise
Local Bank Card
Race fee payment in EUR
✅ Best
✅ Good
❌ 4-7% fees
Hotel booking in foreign currency
✅
✅
❌
Cash withdrawal abroad
✅ Free up to limit
✅ Free up to limit
❌ Often $5+ per ATM
Receive prize money in USD
⚠️ Limited (no IBAN US)
✅ Has US ACH
✅ Slow + expensive
Day-to-day in your home country
❌ Not designed for it
❌ Not designed for it
✅
I use Revolut + my home bank combined. Revolut for travel/multi-currency, home bank for everything domestic. (For sending USD-denominated freelance income to my home account, I use Wise — different tool, different job.)
Final Take
If you race abroad even once a year, Revolut pays for itself on the first trip via FX savings alone. Free plan is more than enough for most runners.
If you’re a one-marathon-per-decade kind of runner who only stays in your home country, you can skip this. Otherwise — open the account, get the card, save yourself the bank fees.
Links in this post are referral links. If you sign up using my link, we both receive a sign-up bonus. This does not affect your cost in any way. I have used Revolut personally since 2019 for international travel and race trips, and this review reflects real experience.
This post is informational. Financial products carry risks; check current terms on the official Revolut website before signing up.
Other Tools I Use for Race Travel
Airalo eSIM (use code GUILHE4334 for both of us to get $3 credit) — local data plans without SIM swapping (covered in another post)
Wise — for receiving USD-denominated freelance income (we both get a fee-free transfer when you sign up)
TapTap Send — what I use to send money back to Brazil from abroad. Use code GUILHERM441 and get €10 when you send €25+ (we both benefit)
The northeastern coast of Brazil has always had a mystical pull for adventure seekers. For me, the beaches of Preá and Jericoacoara weren’t just postcard-perfect backdrops of turquoise waves and windswept dunes—they were playgrounds where adrenaline met serenity. When I arrived in Ceará with my kite surf gear packed, my heart raced at the thought of riding some of the best winds in the world.
Kite surfing in Preá is an experience unlike any other: the consistent trade winds push you forward with exhilarating force, while the vast expanse of ocean gives you the sense of absolute freedom. The community of riders here is international yet tight-knit; everyone is bonded by the same hunger for wind and water.
But with high-performance sports comes risk. One afternoon, after hours of pushing my limits, fatigue set in. I attempted a maneuver that my body wasn’t ready for. A sudden twist, an awkward landing, and the unforgiving pull of the kite line left me with a sharp pain shooting down my leg and lower back. Within seconds, my trip went from dream to nightmare.
Pain is never just physical. The psychological weight of an injury, especially when you’re far from home, can crush your spirit. I had planned weeks of kite surfing, running, and exploring. Now I struggled just to walk along the sand.
It was at this low point, limping through Jericoacoara’s sandy streets, that I discovered BodyCare Pilates, a small but vibrant studio run by a team of dedicated women. Their reputation for helping athletes recover had reached me through local whispers. I decided to give it a chance, not knowing it would redefine my entire journey.
2. The Science and Art of Physiotherapy
Physiotherapy is often misunderstood as something people turn to only after surgery or when chronic pain becomes unbearable. But in reality, it is both a preventative and restorative discipline—a science rooted in anatomy, biomechanics, and neurology, but also an art of observing, listening, and guiding the body back to balance.
When I stepped into BodyCare Pilates, the atmosphere was immediately reassuring. The space was calm, filled with natural light and soft music. But what stood out most was the professionalism of the physiotherapists. They didn’t just ask me where it hurt; they analyzed how I walked, how I held tension in my shoulders, how I compensated with one side of my body.
My diagnosis wasn’t catastrophic, but it was serious enough: muscle strain compounded by misalignment in my pelvis and lower spine, common in kite surf injuries. The treatment plan was clear—reduce inflammation, restore mobility, and build functional strength to prevent recurrence.
Physiotherapy room of body care pilates on préa beach
What impressed me was the integration of manual therapy, targeted exercises, and Pilates-based movement. Physiotherapy here wasn’t passive. I wasn’t just lying on a table waiting for ultrasound or massage. Instead, I was guided into movements that retrained my body, reawakened dormant stabilizers, and gently stretched overworked muscle groups.
The sessions also included education—why I got injured, what warning signs I ignored, and what movement patterns were setting me up for failure. That holistic approach gave me something more powerful than temporary relief: it gave me the tools to understand my own body.
3. Rediscovering Movement Through Pilates
Before this trip, Pilates was something I associated with elite athletes or dancers. I had always imagined it as slow, controlled, and perhaps too gentle for someone who loved explosive sports like running and kite surfing. BodyCare Pilates shattered those preconceptions.
The instructors introduced me to the Reformer, a piece of equipment that uses springs and pulleys to provide resistance. At first, I felt clumsy, my body reluctant to trust movements that required such precision. But soon, I realized how deeply effective it was. Every small motion engaged not just surface muscles but the deeper stabilizers that protect joints and spine.
For an athlete, Pilates is a revelation. It’s not about how much weight you lift but how well you control your body in space. It addresses asymmetries, strengthens the core, and enhances flexibility—all critical elements for injury prevention.
In my case, Pilates became the bridge between pain and performance. The exercises focused on elongating tight muscles, realigning my posture, and activating glutes and abdominals that had been dormant. Within days, I noticed I could walk more fluidly, stand taller, and even sleep without waking from discomfort.
What struck me most was how empowering the practice felt. Physiotherapy had reduced my pain, but Pilates gave me back confidence in my movement. It wasn’t just rehabilitation; it was re-education. I started to feel like an athlete again, not a patient.
4. The Emotional Side of Recovery
Injury recovery isn’t only physical; it’s a mental marathon. The frustration of limitations, the fear of reinjury, the envy of watching others kite surf while you sit on the sidelines—it can wear you down.
But at BodyCare Pilates, I found something beyond exercises. I found community. The women running the studio weren’t just therapists; they were cheerleaders, mentors, and compassionate listeners. They understood that healing requires encouragement as much as protocols.
Every session began with genuine questions: How are you feeling today? Did the exercises reduce your pain? Were you able to walk more comfortably? Those simple acts of care built trust. And when I faltered, they reminded me that progress isn’t linear. Some days are setbacks; others are breakthroughs.
In Jericoacoara, surrounded by endless horizons and sunsets that painted the dunes in gold, I learned the importance of patience. Healing can’t be rushed. Just as the wind dictates when a kite surfer can ride, the body dictates its own pace of recovery.
I journaled my progress daily, noting not just the reduction of pain but also the return of small joys: the first pain-free walk on the beach, the first stretch where my back didn’t spasm, the first deep breath I could take without tension. Those milestones, though invisible to others, were victories worth celebrating.
5. Lessons Learned and Moving Forward
By the time I left Preá and Jericoacoara, I wasn’t just healed—I was transformed. My body felt stronger, more aligned, and more resilient than before the accident. More importantly, I had gained knowledge and habits that will shape my training for years to come.
Here are the key lessons I carry with me:
Listen to the body’s whispers before they become screams. Fatigue, stiffness, or imbalance are early warnings. Ignoring them leads to injury.
Physiotherapy isn’t just about fixing pain—it’s about optimizing movement. Every athlete, from casual runners to professional surfers, can benefit from periodic assessments.
Pilates is the secret weapon for athletes. It strengthens what’s weak, lengthens what’s tight, and balances what’s imbalanced. It’s not soft; it’s smart.
Healing is holistic. Mental health, environment, and support systems are as crucial as exercises and stretches. Being treated with kindness at BodyCare Pilates made as much difference as the treatments themselves.
Injury can be a teacher. Though I wouldn’t wish pain on anyone, this experience reminded me that setbacks are opportunities to rebuild stronger and wiser.
As I write this for runningwithjoe.com, I’m back to running, training, and even kite surfing—with a newfound respect for recovery. The beaches of Ceará gave me adventure, but the people at BodyCare Pilates gave me resilience.
If you ever find yourself in Jericoacoara—whether as a kite surfer, runner, or simply a traveler—remember that the body is your most important gear. Take care of it, listen to it, and if you need help, know that there’s a dedicated team ready to guide you back to health.
Introduction If you’re training for a triathlon, you already know that the bike-to-run transition can make—or break—your race performance. That moment where your legs feel like jelly, yet you still have miles to go on foot, is notorious. Enter brick workouts: combined bike-run sessions designed to simulate race day and teach your body (and mind) to switch gears efficiently. In this post, you’ll learn what brick workouts are, why they’re essential, and how to incorporate them into your training plan for smoother transitions and faster overall splits.
What Are Brick Workouts?
A “brick” workout is simply back-to-back training in two disciplines—most commonly cycling immediately followed by running. The term “brick” is often explained two ways:
Muscle rigidity: You emerge from the bike with stiff legs—like bricks—so you learn to loosen up quickly.
Building blocks: Each discipline “builds” on the previous, constructing the full triathlon experience.
Key Benefits of Brick Workouts
Neuromuscular Adaptation
Trains your nervous system to fire the proper muscle groups during the awkward bike-to-run shift.
Pacing Practice
Teaches you how hard you can push on the bike without compromising your run legs.
Mental Toughness
Familiarizes you with the discomfort of transition; reduces surprise on race day.
Race Simulation
Mimics the flow of event day, from mounting your bike to pounding the pavement.
How to Structure Your Brick Sessions
Warm-Up (15–20 minutes)
Easy spin on the bike, followed by dynamic mobility drills like leg swings and hip circles.
Bike Segment
Base bricks: 45–60 minutes at endurance pace.
Intensity bricks: 20–30 minutes including intervals (e.g., 5 × 3-minute efforts at threshold).
Quick Transition
Rack your bike, swap shoes, and head out. Keep the transition practice realistic—time yourself.
Run Segment
Post-ride jog: 10–20 minutes at easy effort for adaptation.
Brick intervals: 2–4 × 5 minutes at race-pace effort, with 2 minutes easy in between.
Cool-Down
5–10 minutes easy running, followed by thorough stretching and foam-rolling.
Sample Brick Workouts
Workout Type
Bike Portion
Run Portion
Endurance Brick
60 min @ Zone 2 (steady aerobic pace)
15 min @ Zone 1–2 (easy jog)
Speed Brick
10 min warm-up; 6 × 2 min @ Zone 4 w/2 min easy
6 × 2 min @ 5K pace w/2 min easy
Threshold Brick
5 min warm-up; 3 × 8 min @ Zone 3 w/4 min easy
3 × 5 min @ half-marathon pace w/3 min easy
Nutrition & Hydration Tips for Bricks
On-Bike Fuel: Practice taking gels or bars during your bike ride to know what sits well in your stomach.
Race-Day Hydration: Sip water or electrolyte drink on the bike, and have a small bottle or handheld on your run.
Pre-Brick Snack: 30–60 min before your session, aim for 200–300 kcal of carbs + a bit of protein (e.g., banana with nut butter).
Post-Brick Recovery: Within 30 min, consume a 3:1 carb-to-protein recovery shake or meal to replenish glycogen and kickstart muscle repair.
Gear Recommendations
Race-Ready Bike Setup: Clip-on aerobars to practice your true race position.
Quick-Change Run Shoes: Choose a lightweight pair with minimal laces (elastic or lock-lace systems) for faster transitions.
Transition Mat & Gear Bag: Layout your shoes, helmet, sunglasses, and nutrition exactly as you will on race day.
Heart Rate Monitor or Power Meter: Crucial for pacing both bike and run segments accurately.
Common Mistakes to Avoid
Skipping the Transition Practice: Simply doing bike and run separately won’t prepare you for the shock of shifting muscle recruitment.
Overdoing Intensity: Hard bricks are valuable, but too many can lead to fatigue or injury. Balance with easy recovery sessions.
Ignoring Nutrition: Your stomach needs practice just like your legs—simulate your race-day fueling strategy.
Poor Bike Position: Training in a different handlebar setup than race day will throw off your neuromuscular adaptation.
Conclusion
Brick workouts are the cornerstone of any solid triathlon plan. By systematically combining cycling and running sessions, you’ll desensitize your legs to the infamous “heavy” feeling, dial in your pacing, and gain confidence for race day. Start incorporating one brick per week into your training—vary the length and intensity as you build toward your A-race. With consistency, you’ll step off the bike ready to crush your run without skipping a beat!
For runners aiming to enhance their overall performance and reduce the risk of injury, integrating strength training into your regular workout routine is essential. In this post, we explore why strength training is a game changer for runners, discuss key exercises, and provide actionable tips on incorporating these workouts without sacrificing your running mileage. Whether you’re a beginner or an experienced athlete, this guide is designed to help you unlock new levels of endurance and speed.
Why Strength Training is Vital for Runners
Strength training offers multiple benefits that directly impact running performance, including:
Improved Muscle Efficiency: Building stronger muscles in the legs, core, and even the upper body enhances your running economy. This means you can run faster and for longer periods with less energy.
Enhanced Injury Prevention: Exercises that target muscle balance and stability are crucial in reducing the risk of common running injuries, such as shin splints, knee pain, and hamstring strains.
Better Power and Endurance: By incorporating resistance training, you’ll increase your muscular power, which translates to better sprints and overall race performance.
Increased Stability and Balance: A strong core is the foundation for excellent running form, helping to maintain alignment and posture throughout long runs.
Implementing strength training into your routine complements your cardiovascular workouts and sets the stage for more rapid improvements in performance.
Key Strength Training Exercises for Runners
Here are some essential exercises that every runner should include in their routine:
Squats and Lunges: These exercises target the quadriceps, glutes, and hamstrings. They are fundamental for building the lower body strength required for explosive starts and powerful strides. SEO Keywords: squats for runners, lunges for running performance
Planks and Core Workouts: A strong core stabilizes your body, minimizes energy leak, and helps maintain proper form during long runs. Incorporate planks, side planks, and leg raises into your workout. SEO Keywords: core training for runners, planks for running
Plyometric Exercises: Include box jumps, jump squats, or bounding to develop explosive power and improve your running stride efficiency. SEO Keywords: plyometrics for runners, explosive strength training
Resistance Band Workouts: Use resistance bands to strengthen smaller stabilizing muscles around your hips and ankles, which are crucial for overall stability. SEO Keywords: resistance band exercises, hip stability for runners
Integrating Strength Training Into Your Running Routine
Combining strength training with your running schedule can be challenging, but a well-structured plan will yield the best results:
Start Slow: Begin with 2 strength sessions per week. This allows your muscles to adapt without detracting from your running performance.
Schedule Smartly: Ideally, place your strength workouts on non-running days or after easy runs. Avoid doing heavy strength training immediately before a long run to preserve energy.
Combine with Recovery: Allow at least 48 hours between intense strength sessions. Adequate recovery is crucial to maximizing muscle gains and preventing overtraining. SEO Keywords: recovery for runners, workout scheduling for runners
Tips for Progression and Recovery
As you build your strength, keep these tips in mind for sustainable progress:
Gradual Increase: Incrementally increase weights or resistance as your strength improves. This prevents injury and ensures long-term progress.
Focus on Form: Proper form is paramount. Consider working with a trainer or using instructional videos to ensure you’re performing each exercise correctly.
Listen to Your Body: Adequate rest, proper nutrition, and hydration are key components in the recovery process. If you notice persistent pain or discomfort, reduce intensity and reassess your form.
Mix It Up: To maintain motivation, change up your routine every few weeks. This can include trying new exercises or altering your workout sequence. SEO Keywords: progression tips for runners, strength training recovery tips
Conclusion
Incorporating strength training into your running regimen is more than just lifting weights—it’s a strategic enhancement to boost endurance, improve speed, and prevent injuries. By focusing on key muscle groups and integrating effective exercises, you’re setting the stage for a more powerful, balanced, and injury-resistant running performance.
Start with a manageable routine, stay consistent, and enjoy watching your running performance improve dramatically. Share your strength training journey in the comments below and let us know how these changes have helped you along the road to peak performance.
Keywords: strength training for runners, running performance, injury prevention, core training, plyometrics, endurance, running workouts
The winds of Preá, Ceará, don’t just call out to kitesurfers—they also whisper to dreamers looking to build their perfect getaway in one of Brazil’s most breathtaking coastal locations. For those drawn to this kitesurfing paradise, Quatro Ventos Construtora stands as the trusted name in bringing your vision to life with excellence, sustainability, and a deep connection to the region.
Why Preá is the Ideal Location for Kitesurfers
Preá, located just minutes from the world-famous Jericoacoara, offers a unique blend of powerful, steady winds and pristine beaches, making it a top destination for kitesurfing enthusiasts. But it’s more than just a haven for sports—it’s a place where you can create a lifestyle perfectly in tune with the ocean, the wind, and the tranquility of coastal living.
Imagine waking up steps away from the beach, grabbing your kite, and hitting the waves at sunrise. Preá isn’t just a vacation spot; it’s the kind of place that inspires people to put down roots. And when it comes to building your dream home or kite-friendly beachfront property, Quatro Ventos Construtora is the name you can trust.
Quatro Ventos Construtora: A Trusted Partner in Preá
With years of experience building in the Ceará region, Quatro Ventos Construtora has earned its reputation as a leader in sustainable and innovative construction. Whether you’re a kitesurfer looking for a retreat by the sea or someone ready to invest in a growing community, they offer tailor-made solutions to suit your needs.
What Makes Quatro Ventos Stand Out?
Local Expertise: The team at Quatro Ventos understands the unique challenges and opportunities of building in Preá, including the sandy terrain, coastal climate, and the region’s distinct architectural style.
Sustainable Building Practices: They prioritize environmentally friendly materials and energy-efficient designs, ensuring that your home harmonizes with Preá’s natural beauty while reducing its environmental footprint.
Custom Designs for Kitesurfers: For kitesurfing enthusiasts, Quatro Ventos specializes in creating spaces that cater to your passion, such as homes with ample storage for gear, beachfront access, and outdoor areas perfect for drying equipment after a day on the waves.
Commitment to Quality: Every project is completed with the highest standards of craftsmanship, ensuring that your dream home is built to last.
Living the Dream in Preá
Building a home in Preá isn’t just about owning a property—it’s about becoming part of a vibrant, growing community of adventurers, athletes, and lovers of the ocean. With Quatro Ventos Construtora, you’ll have a home that reflects the same energy and freedom that kitesurfing brings.
Whether it’s a modern beachfront villa, a cozy kite lodge, or a custom retreat to recharge after a day on the water, Quatro Ventos will make your dream home a reality.
Why Build with Quatro Ventos?
Preá is growing as a kitesurfing hotspot and an ideal location for those seeking a laid-back yet active lifestyle. A home here is not just a place to stay—it’s an investment in a lifestyle centered on wind, waves, and community.
For kitesurfers, Preá is the ultimate playground. And with Quatro Ventos Construtora, it can also be home. Build a space where you can rest, recharge, and embrace the thrill of the wind and waves every day.
It’s time to make your kite dreams a reality—both on the water and at home.